Welcome to the Customers page. This is where you can store and manage information about all your customers.
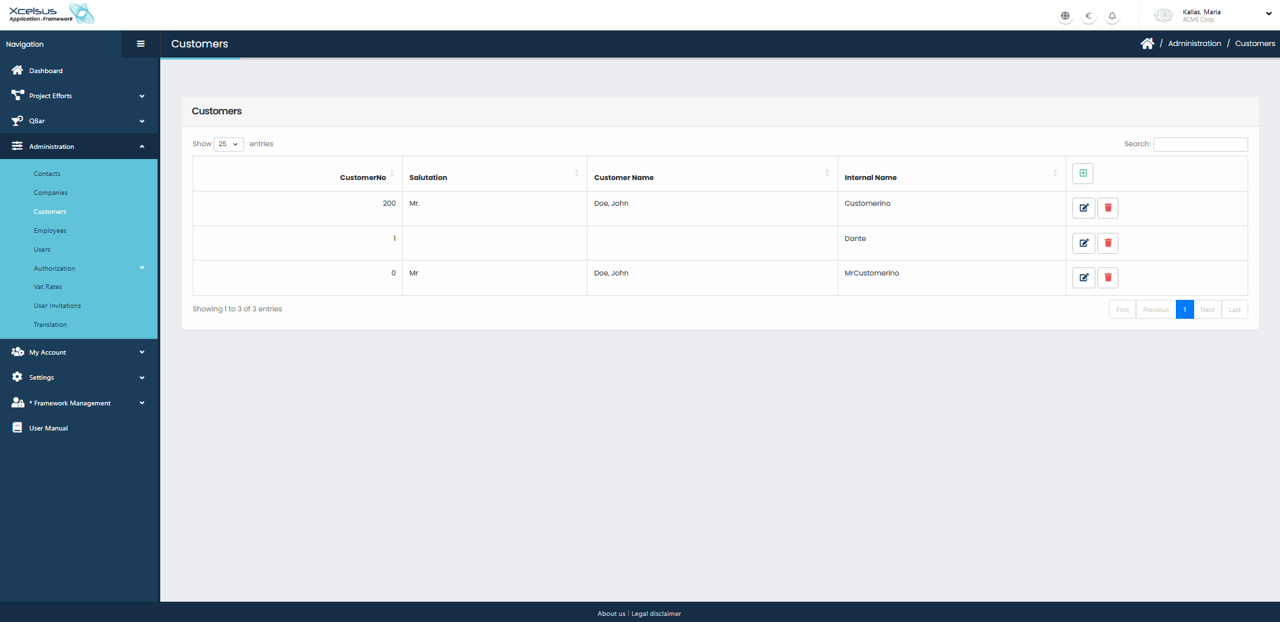
Viewing the Customers List
The Customers page displays a list of all customers currently registered in the system. Each entry includes key information such as the Customer No, Salutation, Customer Name, and Internal Name, allowing users to quickly identify and manage customer records.
At the top of the list, you can choose how many entries to display per page and use the search field to locate specific customers by typing relevant keywords. The list supports pagination, enabling easy navigation through larger customer datasets.
For each customer, action icons are available on the right side of the row. Clicking the edit (pencil) icon opens the customer record for modification, while clicking the delete (trash) icon removes the customer after confirmation. To add a new customer, click the green plus (+) button, which opens the Add Customer form.
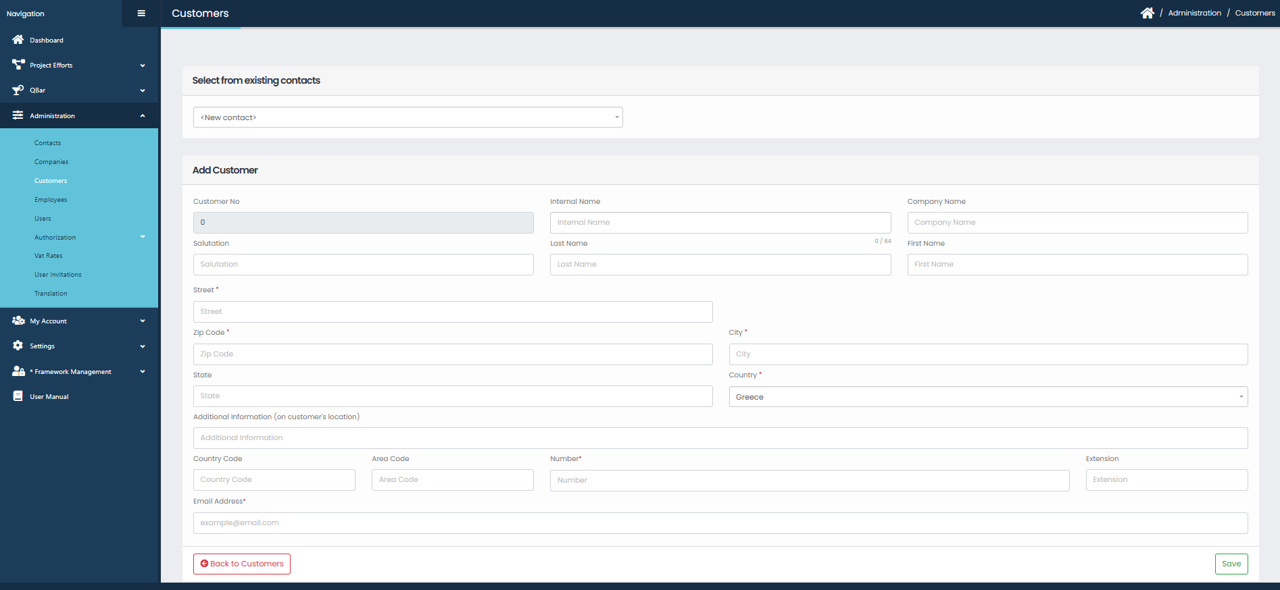
Adding a New Customer
To create a new customer, click the green plus (+) button on the Customers list page. This opens the Add Customer form, where you can enter all relevant customer information.
At the top of the form, you may select an existing contact from the Select from existing contacts dropdown. Choosing an existing contact will prefill certain fields. If you want to create a completely new customer, leave this option as New contact and proceed with manual entry.
The form includes fields for Customer No, Internal Name, Company Name, Salutation, First Name, and Last Name, allowing you to define both personal and internal identification details. Address information is entered in the Street, Zip Code, City, State, and Country fields. Additional location details can be provided in the Additional Information field if needed.
Contact details are entered in the lower section of the form. This includes Country Code, Area Code, Phone Number, Extension, and Email Address. Required fields are marked accordingly and must be completed before saving.
Once all necessary information has been filled in, click the Save button at the bottom right to create the customer. If you decide not to proceed, click Back to Customers to return to the Customers list without saving any changes.